Wednesday, 31 March 2010

Exercise - Object in different positions in the frame

I was thinking what I wanted to choose, a very clear and set object in a large, even background.
I saw my own car parking near the field and thought it should be OK because of the colour (bright yellow) against dark gloomy sky.

a) object in little away from lower right corner


b) object in the corner


c) object in the lower centre


d) object in centre
less sky


The above are in order of preference. I have heard about "rule of third" before from every where from photography books to photography magazines. They all talk about it.
It does make the photo becomes more balanced and enable a viewer of the image to interact with it more naturally.

The top 3 photos where the car is at the lower of the frame, make the sky more prominent.
I like the the first photo where the car is in the little off right of the frame the most because it directs your eyes to view the left of the car which contain a vast field.

Sunday, 28 March 2010

Exercise - Fitting the frame to the subject

I went to town to do this exercise and I found a few objects in mind, buses, bikes and telephone booths. I took photos of them all but I chose buses at the end of my reviewing process.
All the buses were from different buses because they were running around town.

1) conventional viewpoint
it's obvious that it's a bus.


2) fit frame tightly
I think it has highlighted the object more, more predominant to the surrounding.


3) zoom in
it's a bus number 109 but you don't know what it looks like unless you have seen it before.


4) small part of the frame
the bus is less predominant now.


Using photo number 4, I use crop tool to crop the picture as below:
L frame 1


L frame 2


L frame 3


I think the cropping tool makes the bus stands out more and it makes the composition looks differently. I prefer the one below (L frame 3).

Wednesday, 24 March 2010

Exercise - Panning with different shutter speed

I set the camera on the same tripod but I loosen the panning of tripod head so I could pan across.
At the shutter speed setting of 1/80, the background is starting to go blur while the object is fairy sharp, at 1/50, now the object is getting blurrier mainly the arms and legs because of the movement while running. at 1/30, now only the body is fairly sharp while the rest is blurry and the background is quite blur.
I prefer the photo with a bit of blurry in the object and more blur in the background because it does give the scense of speed while the fast shutter speed which capture and freeze all the detail of object and background, even though it doesn't give the sense of how fast the object was moving, it does however shows emotion on the face of the person while running which sometimes is good.
If I were to photograph a child running, capturing the emotion on his/her face would add another aspect to the picture.

Exercise - Shutter speeds

I set the camera on tripod taking series of photos of my husband running across the frame .. (poor him)
The camera was set on Tv mode so the exposure was automatically set the same.
The shutter speed was set from 1/1000, 1/800, 1/640, 1/500, 1/400, 1/320, 1/250, 1/200, ..., down to 1/15. The slowest shutter speed i could see that could freeze the movement was at 1/250 sec. at 1/200 I could see the photo starting to go blur especially from legs area because of having more movement than the upper body.

Tuesday, 23 March 2010

Exercise - Focus at different apertures

f29
f16
f4.5
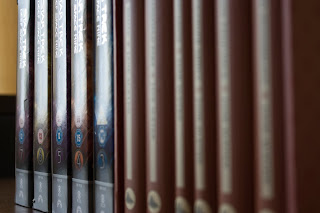
As for this exercise, I still used the same objects as I did with previous exercise, a set of book and a set of DVD.
With different aperture setting, f4.5, f16 and f29 (see photos), I can see the area of picture in focus (sharpness)has increased from small area in the front to the whole scene right to the back.

for some reasons I prefer the one with all the area in forcus (f29) because I don't have to guess what it is.

Exercise - Focus with a set aperture

I took 3 photos of a set of book and a set of DVD using AV mode with f/4.5
focusing at 3 different places, close, middle, far

(a) close


(b) middle


(c) far


Each photo will direct your eye to the focus area because it stands out of the blurry surrounding.
I prefer the one with the focus made to the area closer to my eyes (the one on the top (a)) because I feel like my eyes don't have to travel far to see the object.

Thursday, 18 March 2010

Exercise - Focal length and angle of view

Using my kit lens and telephoto lens, I took 3 photos of my bookcase with 3 different focal lenth, 18mm, 55mm (standard)and 250mm respectively.
Having all 3 photos printed on A4 paper and standing where I was, the following was noted:

a) with 55mm standard focal length, to make the objects on the photo appear the same as in real life, I held the paper at 61cm from my eyes.


b) with 18mm wide angle focal length, I had to move the A4 size photo closer to my eyes to the distance of 24cm between my eyes and the paper.


c) with 250mm telephoto zoom lense, the A4 size photo was far too big to move beyond the bookcase so I couldn't measure the distance.

Wednesday, 17 March 2010

Starting the course

The Art of Photography1, I am excited about this course. This is a 2nd course I enrolled with OCA.
I am slightly less nervous now with studying and doing all the homeworks.
I am hoping I would do well and developed and improved my photographic skills.
after all everyone is learning!!